Hi all, and thanks for all of your tutorials and shared experience on this site! My passion for scaring the bejesus out kids started in 1980 when I was thirteen, in my front yard, with a home made Grim Reaper costume. It was such fun giving the friends and fellow kids on my block a good scare for trick or treat!!
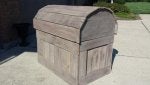
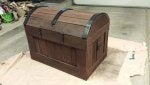
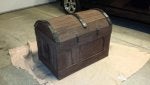
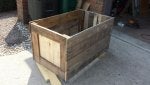
I have been a long-time, avid fan of authentically eerie Halloween props, but never had the necessary amount (at least in my mind) of money, time, or storage space for anything grander than tombstones and lights. This year I turned fifty by calendar's reckoning, but at heart I'm still a thirteen year old in my parents' front yard, so I decided to attempt a fairly large build of a pirate treasure chest, complete with ample amounts of riches! Something rustically fun to hide behind and/or possibly jump out of to scare my latest batch of TOTr's!
Where to start?
Dear, frugal, patient wife requests that I spend less than $50, gently reminding me that we have four kids to clothe and feed. Okay, time to consider dumpster diving for material. Also, she asks, where should/could/would this contraption be stored in the "off" months? To me there is really no "off" month, but I understand she's asking me NOT to consider the formal dining room as a home for this yet-to-be magnificent (at least in my mind) creation of piratical proportions. Okay, in the basement, next to the TV, seems like a good "second" home.
*Note to self- size it to fit trough the door or it's not leaving the garage!
Now for research on how exactly I can pull this off--and, what fortuitous circumstance be this; here is an awesome forum full to the gun'als of information and how-to's!! (I've found myself starting to use pirate-speak now and again to get the proper "feel" of the project).
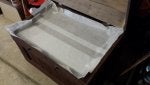
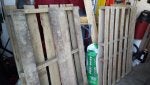
First thing-wood! Where to find wood for free , and by free, I don't mean pilfered. There is a new Starbucks being built in our town, and I have sighted a few pallets and copious amounts of unwanted plywood scraps in their dumpster! This project now has materials!
I have been a long-time, avid fan of authentically eerie Halloween props, but never had the necessary amount (at least in my mind) of money, time, or storage space for anything grander than tombstones and lights. This year I turned fifty by calendar's reckoning, but at heart I'm still a thirteen year old in my parents' front yard, so I decided to attempt a fairly large build of a pirate treasure chest, complete with ample amounts of riches! Something rustically fun to hide behind and/or possibly jump out of to scare my latest batch of TOTr's!
Where to start?
Dear, frugal, patient wife requests that I spend less than $50, gently reminding me that we have four kids to clothe and feed. Okay, time to consider dumpster diving for material. Also, she asks, where should/could/would this contraption be stored in the "off" months? To me there is really no "off" month, but I understand she's asking me NOT to consider the formal dining room as a home for this yet-to-be magnificent (at least in my mind) creation of piratical proportions. Okay, in the basement, next to the TV, seems like a good "second" home.
*Note to self- size it to fit trough the door or it's not leaving the garage!
Now for research on how exactly I can pull this off--and, what fortuitous circumstance be this; here is an awesome forum full to the gun'als of information and how-to's!! (I've found myself starting to use pirate-speak now and again to get the proper "feel" of the project).
First thing-wood! Where to find wood for free , and by free, I don't mean pilfered. There is a new Starbucks being built in our town, and I have sighted a few pallets and copious amounts of unwanted plywood scraps in their dumpster! This project now has materials!

")