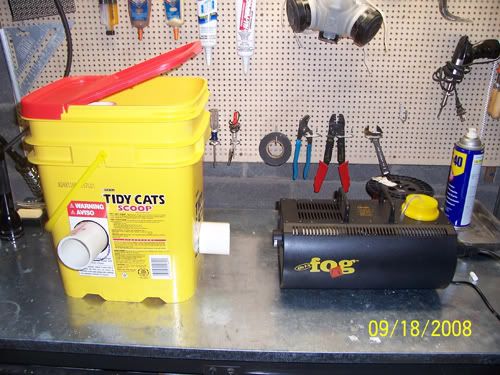
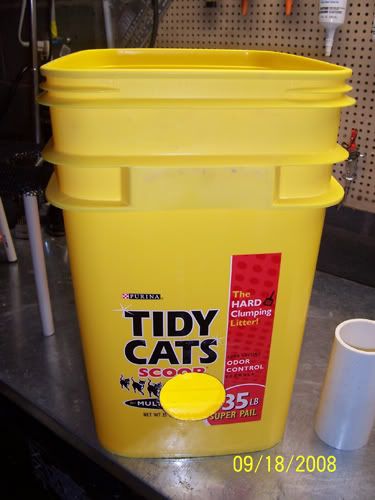
Lets build a chiller that follows the same design principles as the Vortex Fusion model using a Tidy Cats litter pail.
Sorry in advance for not providing measurements as I eyed up everything.
Though you will get the idea by looking at the pictures.
Some guidlines about this design are:
1. Keep the ice at about a 1/3 of the way down the pail so the fog has room to expand up through the ice.
(not to mention that you might get blowback if there is too much ice and the fogger you are using isn't powerfull enough to "push" through the ice)
2. Keep the downpipe at around an inch from the lid. Just enough room for the fog to move down it.
3. Fill the ice tray to the very top of the downpipe and try and use loose cubes.
4. Add some salt to your ice and see if you can get that stuff "colder".")
Parts:
Tidy Cats Litter Pail as pictured
Few ft of 2 in. PVC or ABS pipe
2 in. PVC Elbow
Few ft of 1/2 in. PVC pipe
Some sort of metal mesh or chicken wire to hold ice
Epoxy of your choice (I used Oatey Epoxy Putty)
Krylon Fusion Paint (optional)
Nozzle for Drain Hose (optional)
Drain Hose (optional)
Tools for cutting the materials
Fog Intake hole:
![Image]()
Fog Output Hole:
![Image]()
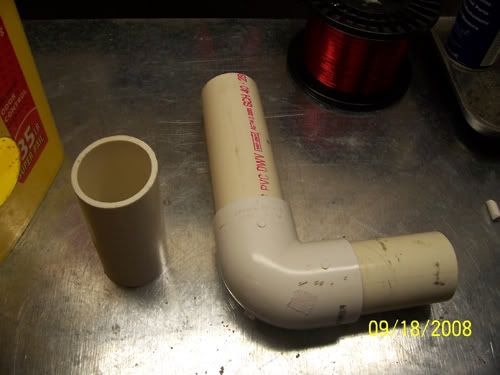
All the 2 in. PVC cut and assembled:
![Image]()
Here is the cage I constructed to hold the ice. I cut the steel to fit about 1/3 of the way into the pail. Then I cut the 1/2in. PVC for legs. I drilled holes into the top of the pipe and used cable ties to mount the legs onto the grate.
![Image]()
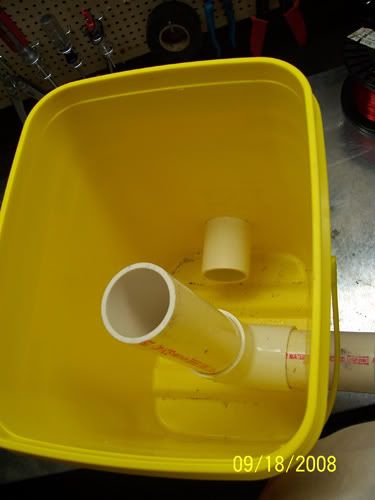
Test fit the 2in PVC pipes:
![Image]()
![Image]()
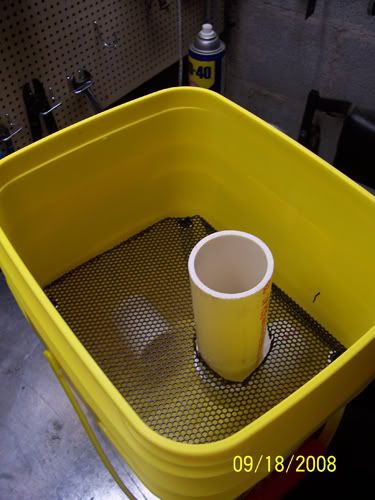
Test fit the grate with the 2in PVC pipes:
![Image]()
Test the input hole height with my 400watt fogger:
![Image]()
Sorry in advance for not providing measurements as I eyed up everything.
Though you will get the idea by looking at the pictures.
Some guidlines about this design are:
1. Keep the ice at about a 1/3 of the way down the pail so the fog has room to expand up through the ice.
(not to mention that you might get blowback if there is too much ice and the fogger you are using isn't powerfull enough to "push" through the ice)
2. Keep the downpipe at around an inch from the lid. Just enough room for the fog to move down it.
3. Fill the ice tray to the very top of the downpipe and try and use loose cubes.
4. Add some salt to your ice and see if you can get that stuff "colder".
Parts:
Tidy Cats Litter Pail as pictured
Few ft of 2 in. PVC or ABS pipe
2 in. PVC Elbow
Few ft of 1/2 in. PVC pipe
Some sort of metal mesh or chicken wire to hold ice
Epoxy of your choice (I used Oatey Epoxy Putty)
Krylon Fusion Paint (optional)
Nozzle for Drain Hose (optional)
Drain Hose (optional)
Tools for cutting the materials
Fog Intake hole:
Fog Output Hole:

All the 2 in. PVC cut and assembled:
Here is the cage I constructed to hold the ice. I cut the steel to fit about 1/3 of the way into the pail. Then I cut the 1/2in. PVC for legs. I drilled holes into the top of the pipe and used cable ties to mount the legs onto the grate.

Test fit the 2in PVC pipes:

Test fit the grate with the 2in PVC pipes:
Test the input hole height with my 400watt fogger: