Halloween Forum banner

Giant Spider pvc legs

1 reading
469K views 300 replies 98 participants last post by  Polly  
#1 ·
This isn't really a how-to but someone asked how I attached the legs to my giant spider. I finally found some old photos . I started with a board and drilled holes for U-bolts. The legs use 45 degree and 90 degree elbows. Once I positioned them I cranked the bolts tight. Here's how they used to look.

Image


Image


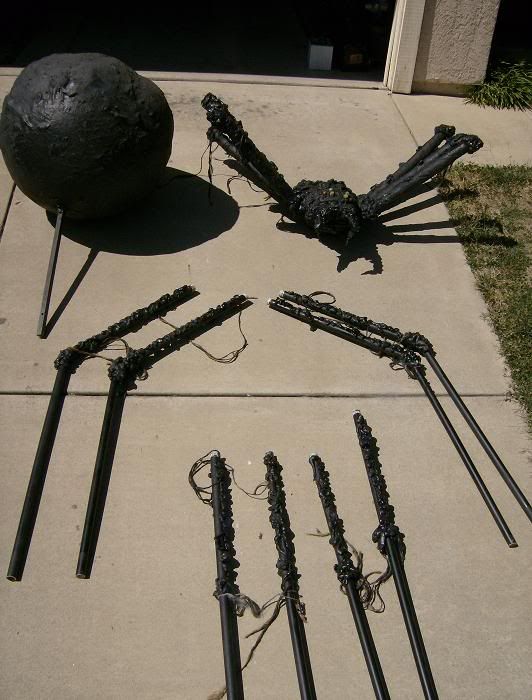
What it looks like now. I added a fiberglass body, great stuff foam over the board and monster mud and burlap to make different thickness for the legs.

Image
 
#5 ·
great spider , very similar to the way i built mine ( your legs look way better ! )heres some pics that might help anyone trying to build on of these

Image

Image

Image


i used different angles at the body , and i also shot a screw on each side of the muffler clamps to keep each set of legs from turning

Image


hope this helps :)
 
#6 ·
Wow! Excactly how I did it. Yours is more of a leggy super model spider. Mine is the pregnant version. Very cool.

As for photos, I light everything with cfl color bulbs in a "clamp-on" reflector painted black. You can see some attached to the spider. (This keeps all lights roughly in the same brightness range) The camera is on a tripod (a must under low light) and shoot after sunset but just before night. This gives a little color to the sky and brings out more detail that will normally go black in a night shot.
 
#13 ·
So your legs are great, but what I really want to know is how you got that fantastic body??? I tried that line at a bar once, and it didn't go so well. Hoping to have more luck here. So really, is there a how to for making the body that I missed? If I said you had a beautiful body would you hold it against me?
 
#14 ·
So are you checkin' out my spiders butt or Scarry Garry's? Mine is a fiberglassed beach ball with a tube through the middle. I pound some rebar into the lawn and put the tube over it. The legs are a seperate unit that I back up to the body once it's in place.
It was my first fiberglass project. I coated half of the beach ball with cloth and resin and let it harden over night. The ball would deflate by morning so when I added air it would squeeze out in a lumpy shape which was a plus that made things look more organic. I then coated the other half. I left the ball inside.
 
#19 ·
Here are some assembly pics. The measurements are almost done. The string is some jute pulled apart and hot glued on so they hang down from the legs. When there's a light breeze it adds to the creep factor. The eyes are vaseline glass marbles that glow under black light. The spider was part of a school haunt for 3 years and under blacklight inside.

Image


Image


Image


Image


Image


Image


the only 90 degree elbows are at these joints
 
#20 ·
The 4 straight legs are 5 ft. long. Two of the angled legs are 29"top and 36" bottom
the other 2 angled legs 29" top and 40" on the bottom. The angle pipe fittings are 45 degrees.
The longer angled legs are the ones that stick up near the back. The board the legs attach to is around 14" (hard to tell under the Great Stuff foam.) For different leg thicknesses I used grey foam pipe insulation covered with burlap soaked in monster mud. The middle section is a great stuff foam coating and the bottom section is bare pvc pipe.


Image